How to block emails on iPhone
How to block emails on iPhone
Everybody in this world, There is very little time in life to receive emails from people selling what you do not want or who feel that it is their personal mission to make your life miserable with annoying or obnoxious comments.Thank god that Apple Agreed to , as iOS 13 can block spammers. now in this, has a feature that allows you to block specific people and it only takes a few seconds to get up and running.
In this article we will show how you how to use this very useful feature and clean your inbox from the chaos of chaos means unwanted emails.
👉How to use the block feature in iOS 13
Nowadays, Preventing someone from bothering with email is very easy to do in iOS 13.
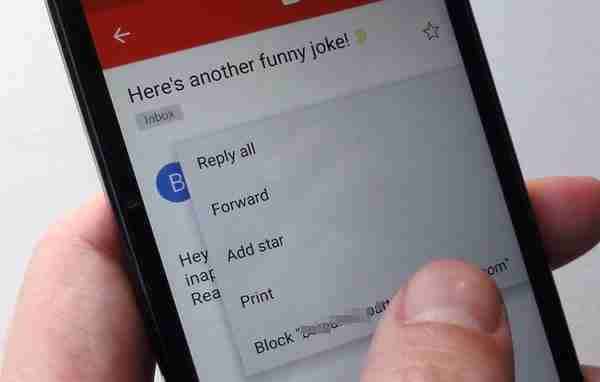
First, open the Mail app, then find the offensive email. Tap to open it and you will see the sender’s name in the top left corner. Tap this and from their onwards, you will find The field should appear in blue with the sender’s name. Tap the latter and it will open the contact sheet for the person.
Here you will have various options, but near the top of this contact, you can block it . Tap it, confirm your intention by blocking this tap. Contact once more and now any email you send will be immediately sent to your bin folder.
Deciding what to do with email from blocked users
iOS 13 gives you granular controls so that you can specify how it treats emails received from blocked users. To find them, go to Settings> Mail> Blocked Sender Options, where you’ll be given three options: None, Mark as Block, Drop in Inbox, and Move to Bin.
many time All are self-evident, in that they either consider the emails as normal (none), get them in their inbox and must highlight the fact that they are from a blocked sender (mark in blocked, leave in inbox), or Send them directly to the trash (move to bin). Select the one that matches your preferences and then return to the home screen and your commands will be implemented by mail.
It is worth notifying that the setting will be active for emails you receive from now on, but Nevertheless that those are already in your inbox until you use them.
Unblock a contact
Can a time come when the person you have blocked once again proves himself worthy of your attention, it is as easy to restore them to normally . To do this, go to Settings> Mail> Blocking and tap on the Edit option in the upper right corner.
with This there should bring up the deleted options on the left side of every contact in your blocked list, so tap the red circle next to the person you want to restore, then select unblock, and they immediately return to active service. Will go
If you want to stop email from just the thread you’re involved in, have a look at how to mute conversations in email on iOS 13, and you should also see what else Apple has added. In its latest version of the iPhone operating system.
It is frustrating to have an inbox of emails filled with unknown and unsolicited and unsolved messages that You do not mention explicit details from time to time!
The most important and updated good news is that Apple offers optional ways to prevent people from sending all that junk to their email inboxes. And by starting in iOS 13 and iPadOS, we have even more options to block those boring and unwanted specific emails.
Block unwanted email on your iPhone, iPad or iPod
The way we communicate today is changing dramatically with the adventage of new technologies. Apple iPads and iPhones are great communication tools in that they allow you to communicate through email, messages, lifespan, and sometimes even make a phone call through VOIP applications that are different from Skype, WhatsApp, and others.
However, the price we pay for all these different channels of communication are that it opens up even more spam messages to us in the form of unsolicited communication.
With apple iOS 13+ and iPadOS, you can now ignore them by blocking. your blocked senders using the two features (Blocked and Blocked Senders option) in Settings> Mail. This blocked contact list can be shared with Messages, Face Time and Phone and you can also change those in app settings!


Comments
Post a Comment